Open-source Zigbee hub

Your own Zigbee hub, on one small ESP32 board

ZHAC turns an Espressif ESP32 board into a complete Zigbee hub. The radio, the device library, your automations and the web interface all run on the board. No Raspberry Pi, no Docker, no cloud account.

Flash your board View on GitHub
  • Works offline
  • 4,988 device models
  • Updates over the network
zhac.local
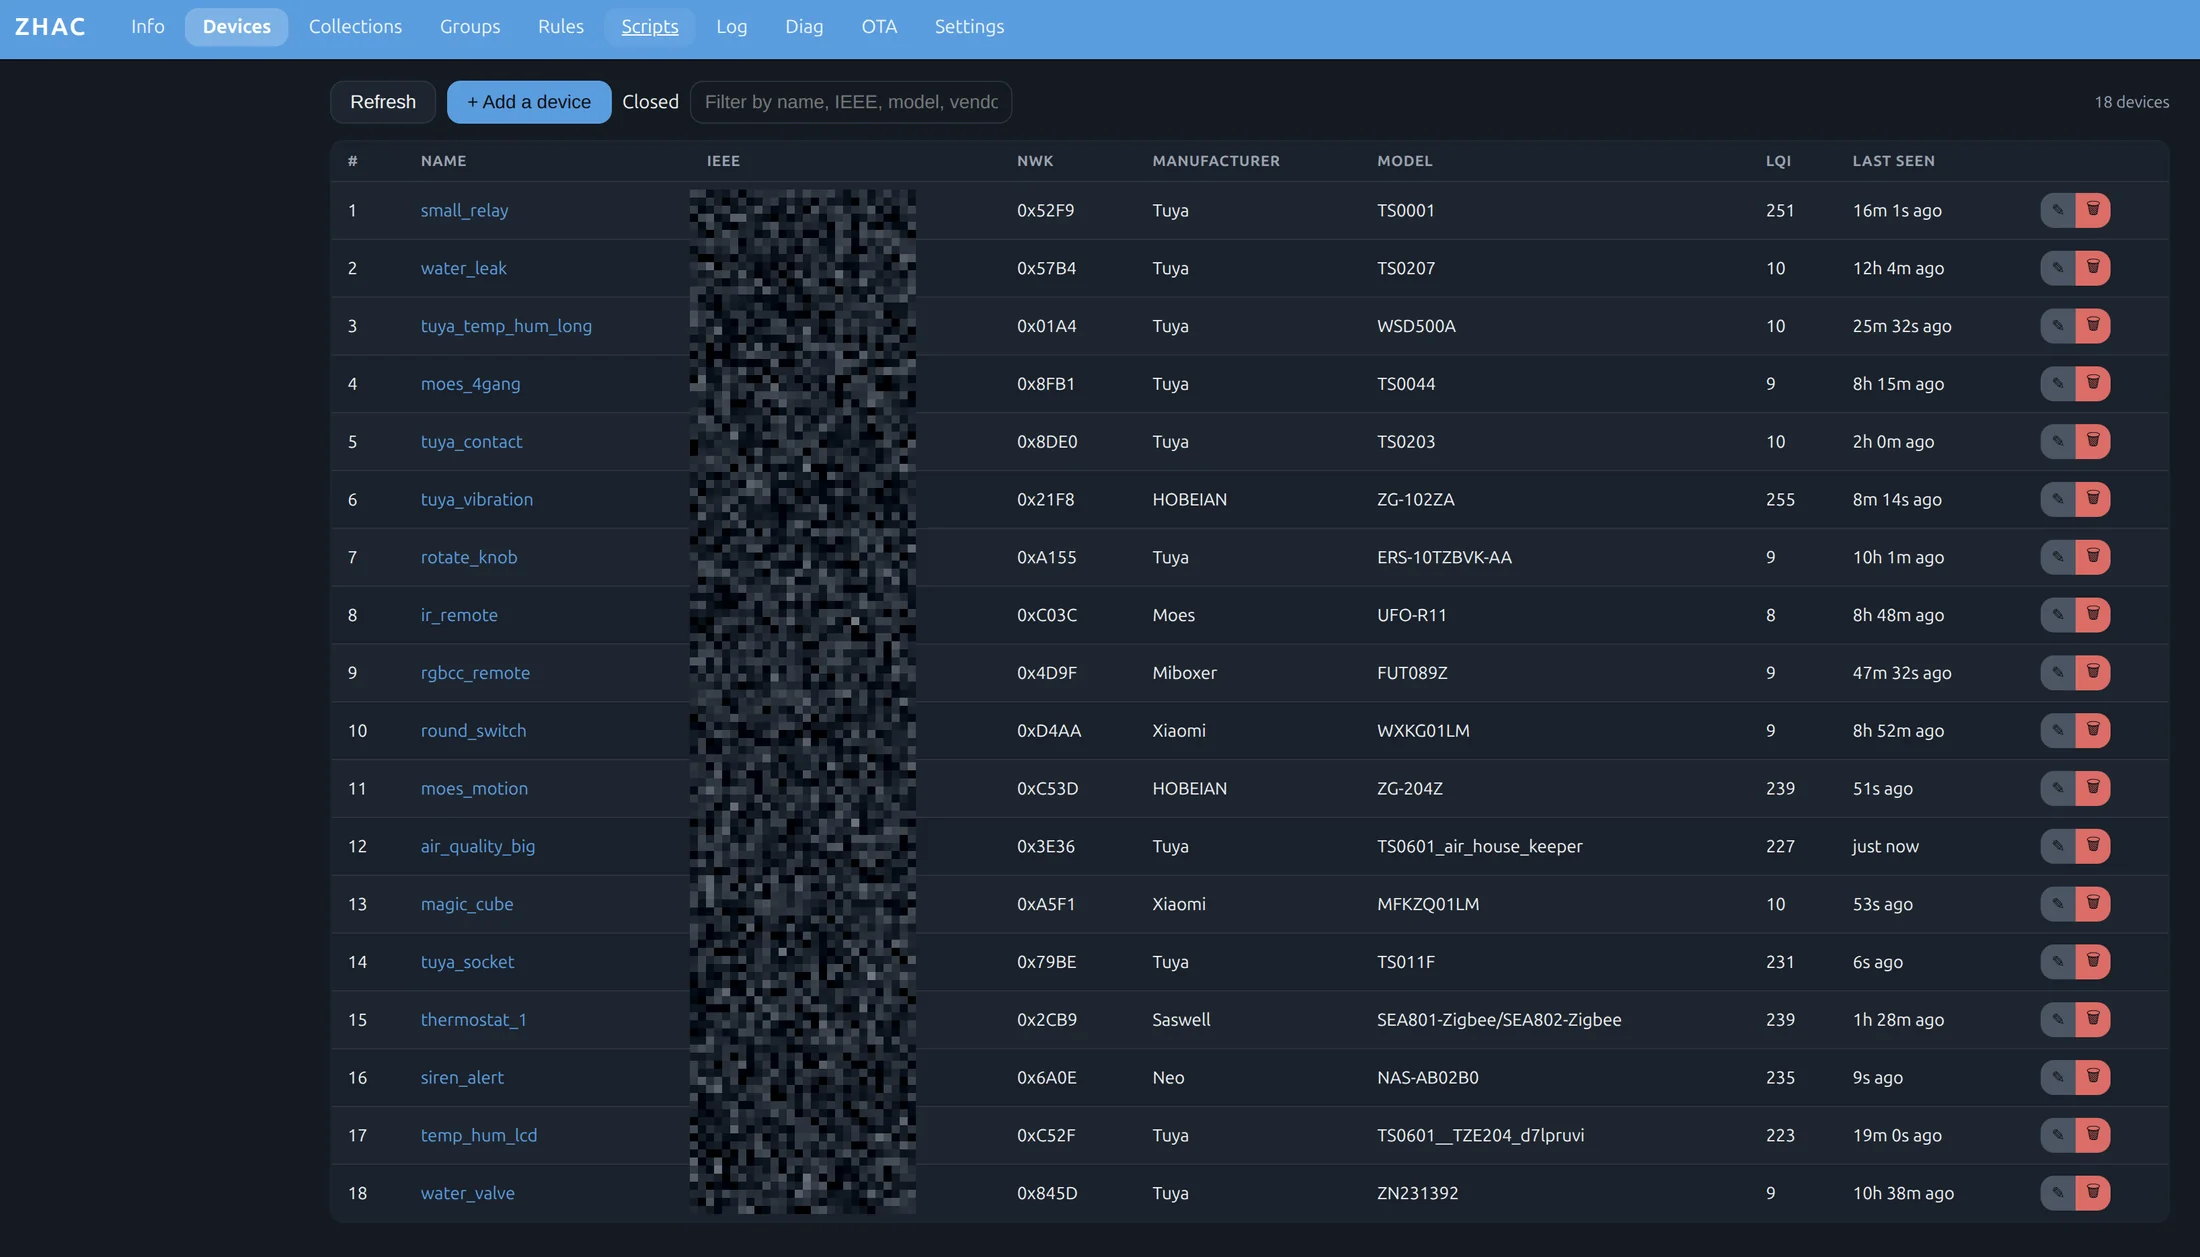
The ZHAC web interface on a real hub, listing 18 Zigbee devices from Tuya, Xiaomi, Moes, Saswell, Neo and other brands
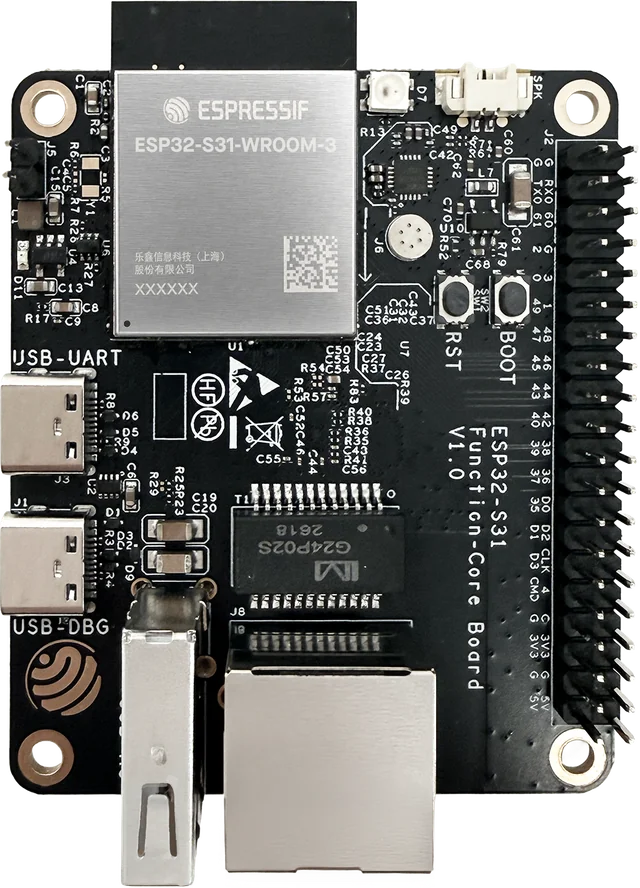
The Espressif ESP32-S31 Function-CoreBoard
Espressif ESP32-S31 Function-CoreBoard

Everything a Zigbee hub needs, on the board itself

No server in a cupboard, no container to keep updated. Power and a network cable, and the hub runs.

One board, nothing else to run

The Zigbee radio sits on the chip and the board has Ethernet. Plug in power and a network cable — that is the whole setup.

4,988 device models from 413 brands

Definitions are ported from zigbee2mqtt's converter library and kept in step with its releases. Look up your exact model before you buy.

Search devices

Automations that keep running

Rules and Lua scripts run on the hub, so the lights still switch when the internet — or your server — is down.

Works with Home Assistant

MQTT discovery adds your devices to Home Assistant automatically, with the right controls and units.

Safe updates over the network

Install new releases from the hub's own page. Devices and rules stay, and an update that does not start properly rolls back by itself.

Open source

The firmware and device library are open source under AGPL-3.0. Read it, change it, build it yourself.
See it running

The web interface lives on the hub. Open http://zhac.local from any browser on your network.

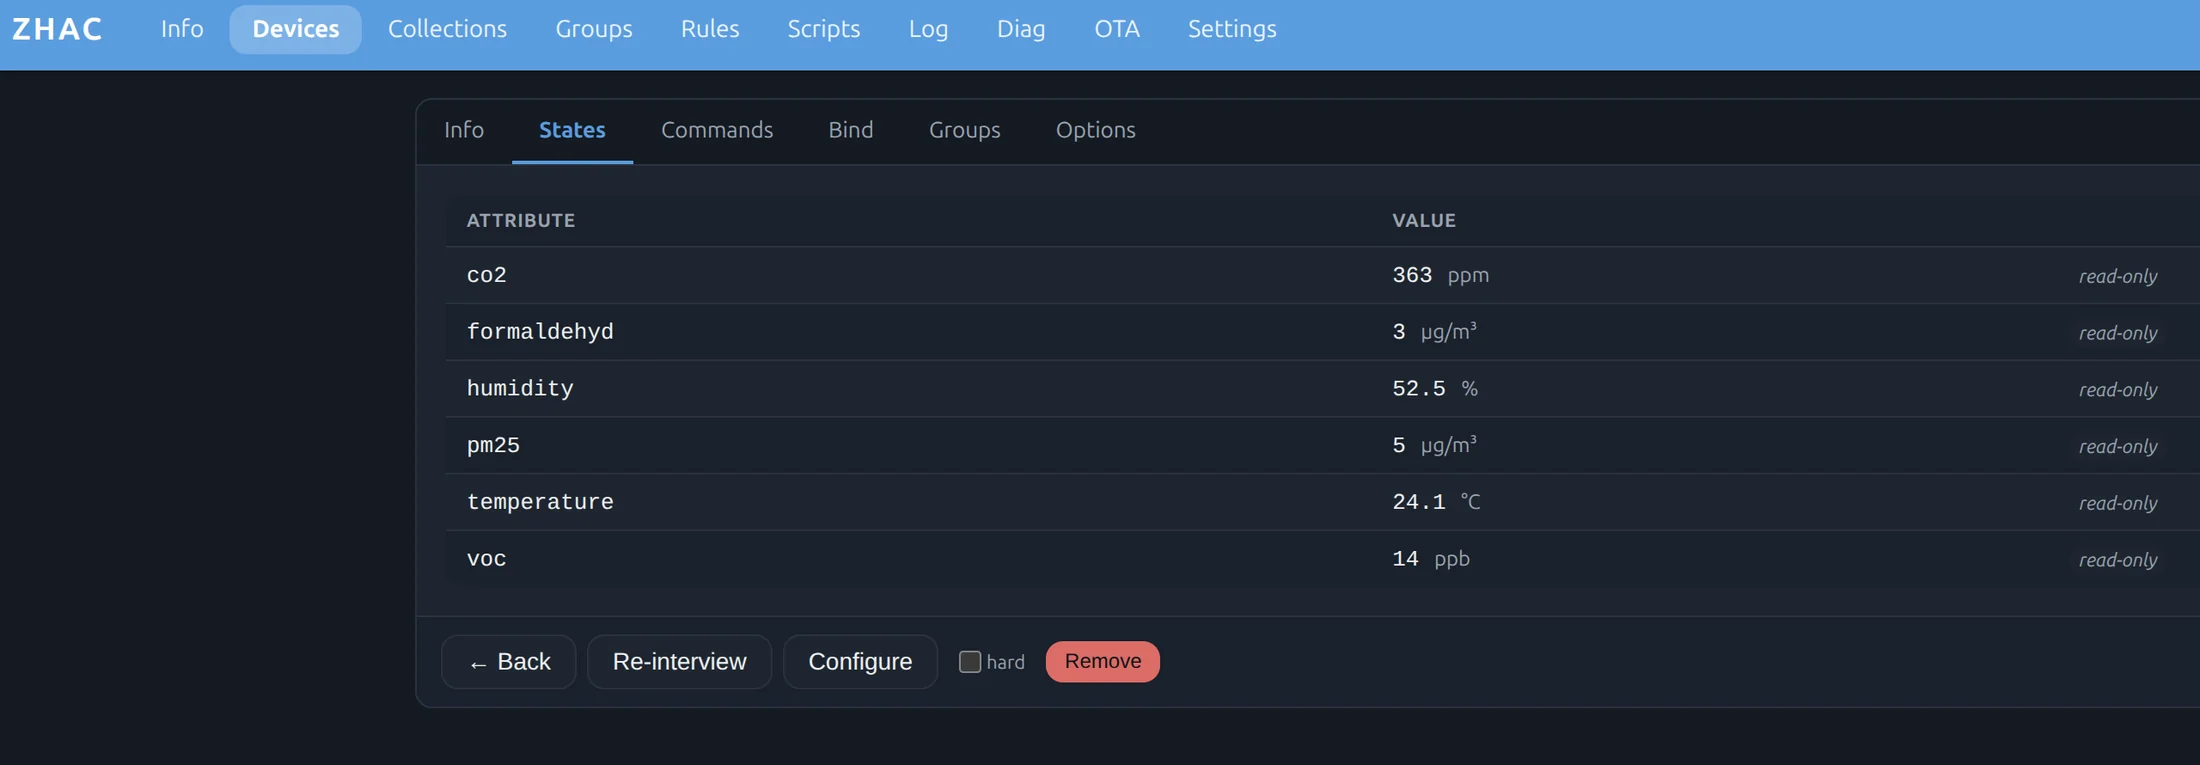
Live readings of an air-quality sensor: CO2, humidity, PM2.5, temperature and VOC with their units
Live readings, with units. An air-quality sensor reporting CO₂, PM2.5, VOC, formaldehyde, temperature and humidity.
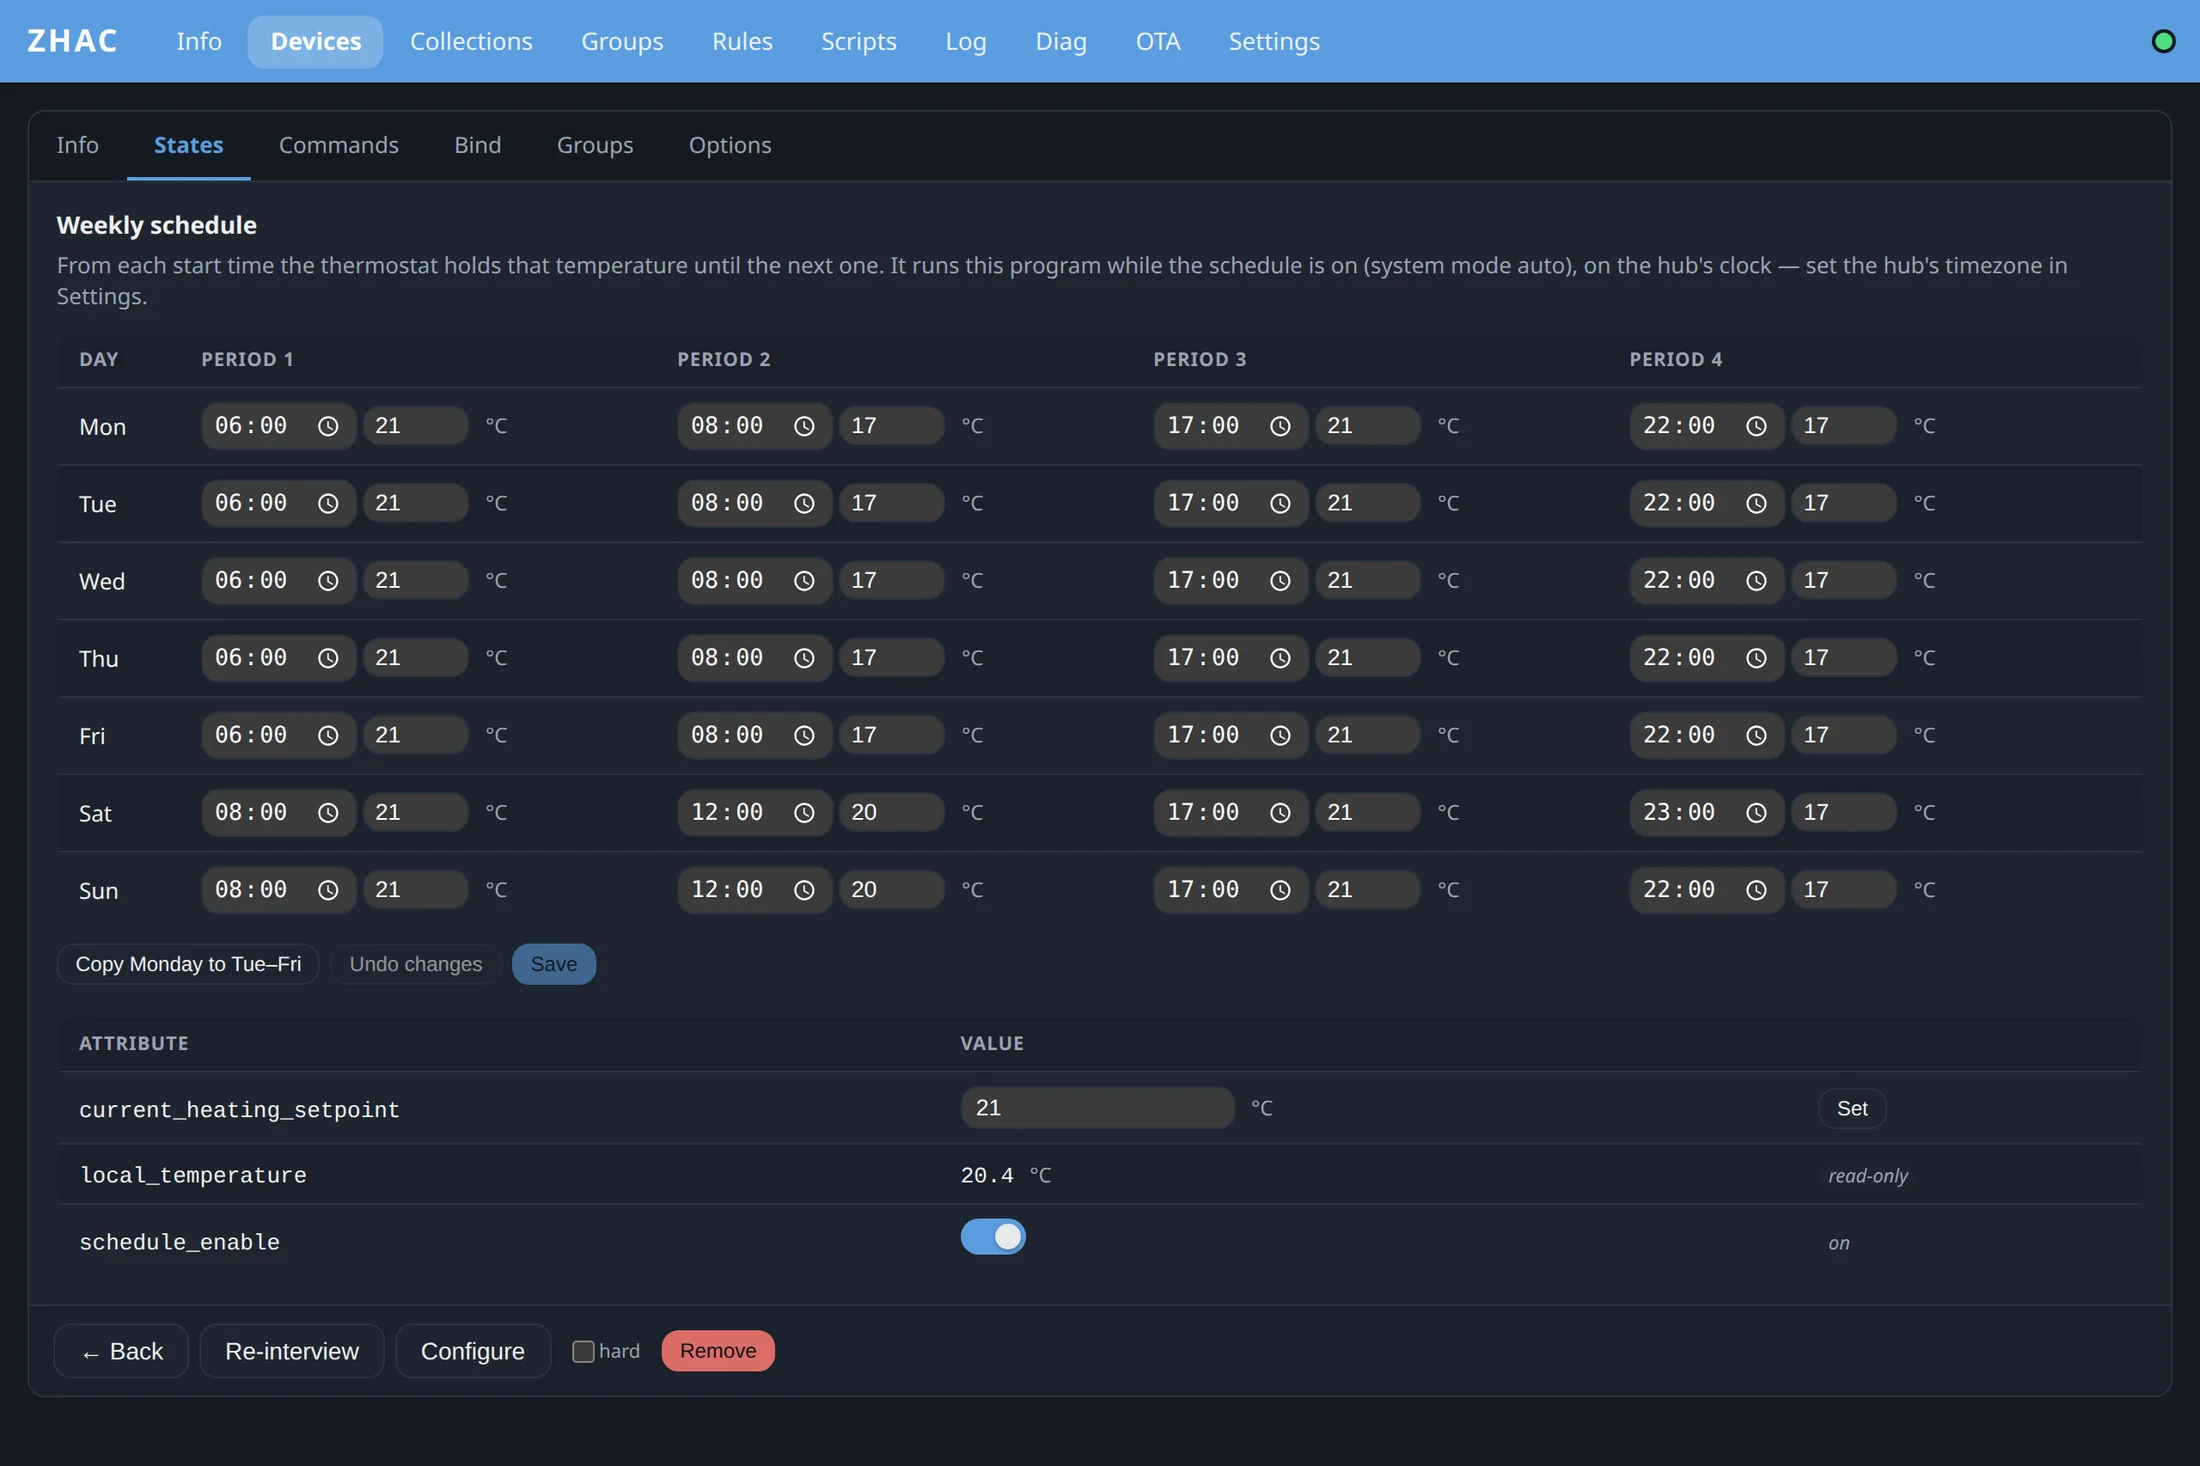
A radiator thermostat's weekly heating schedule with four periods per day, editable in the browser
Every setting the device has. Here a radiator valve's weekly heating schedule, edited in the browser.
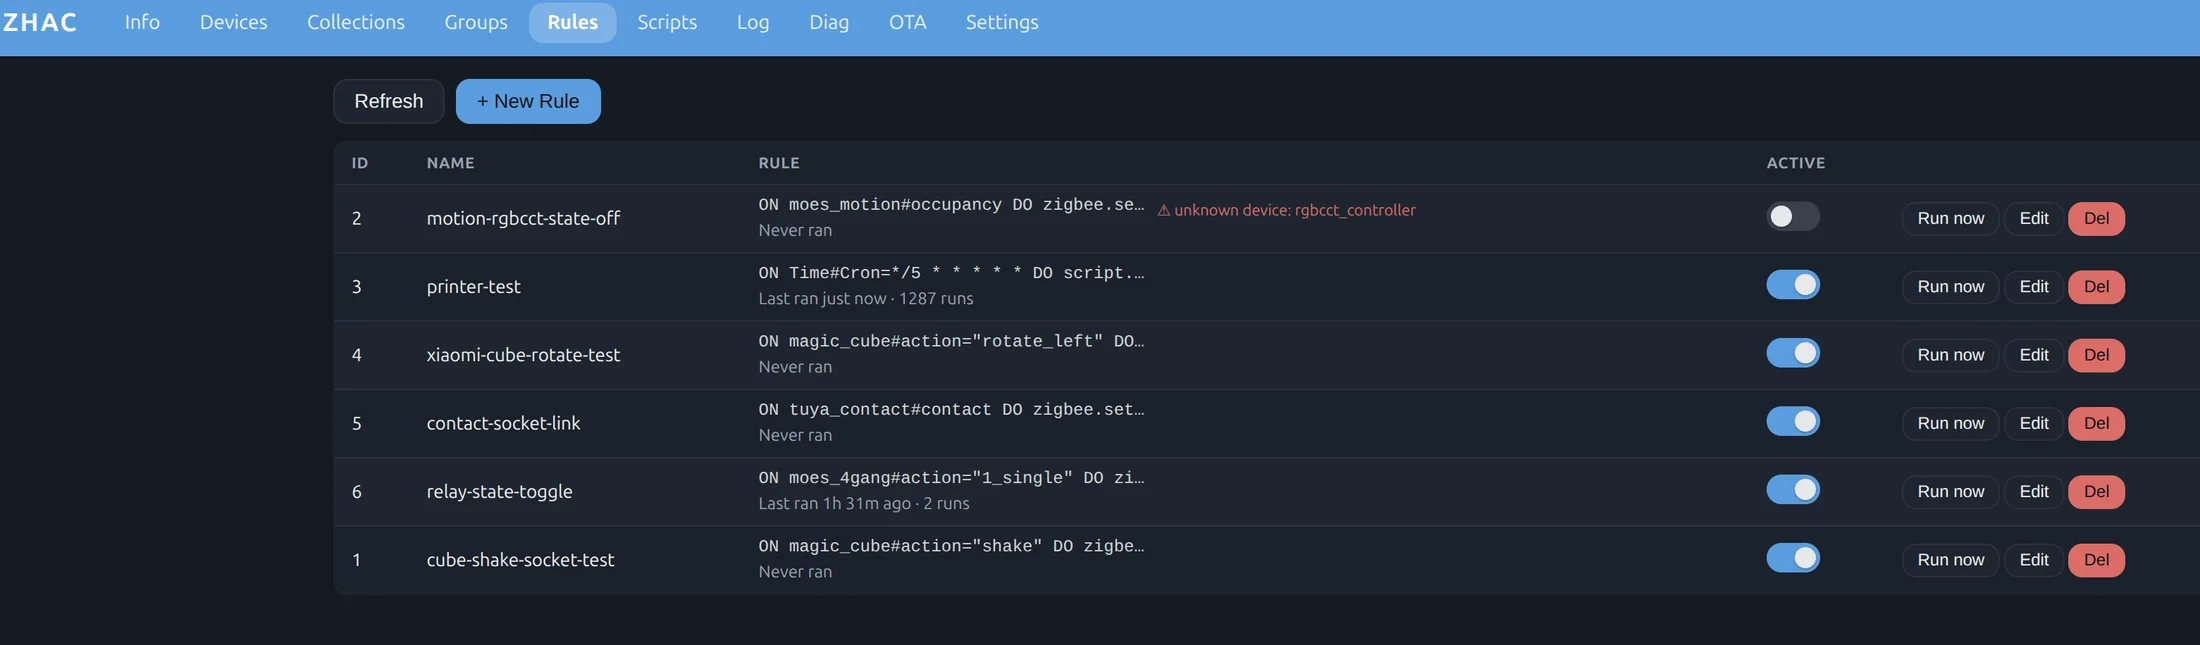
The rules list on a real hub, with Run now buttons and when each rule last ran
Rules that run on the hub. A cube gesture switches a socket, a button toggles a relay. See when each rule last ran, or run it now.
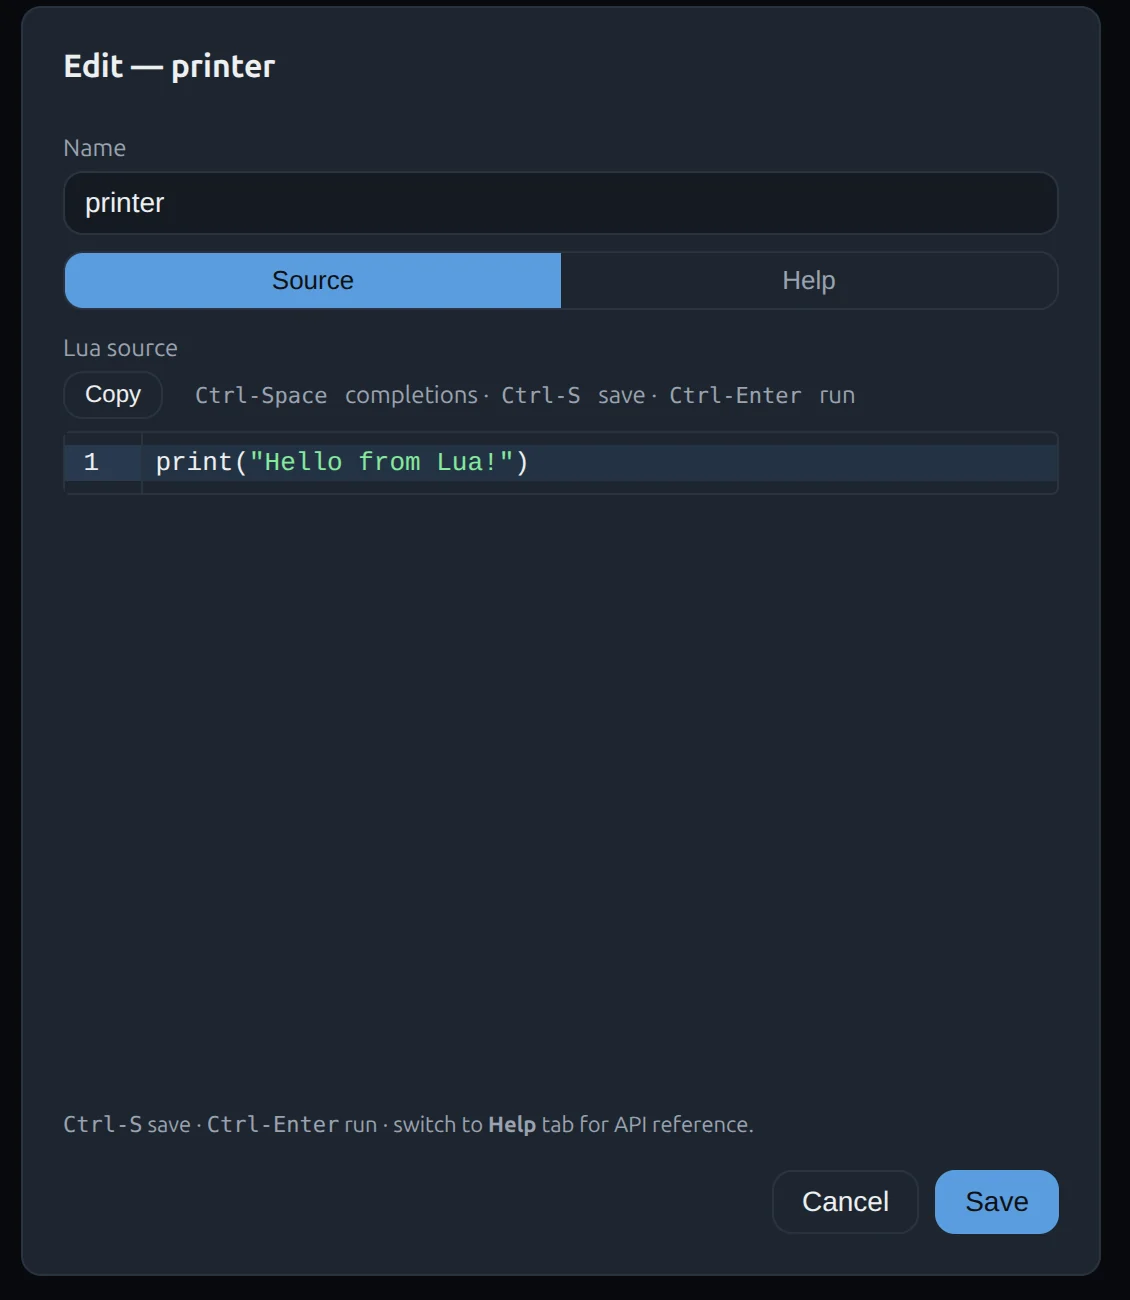
The Lua script editor on the hub, with completions and a Run shortcut
Lua when rules are not enough. Write scripts in the browser, with completions, and run them on the hub.
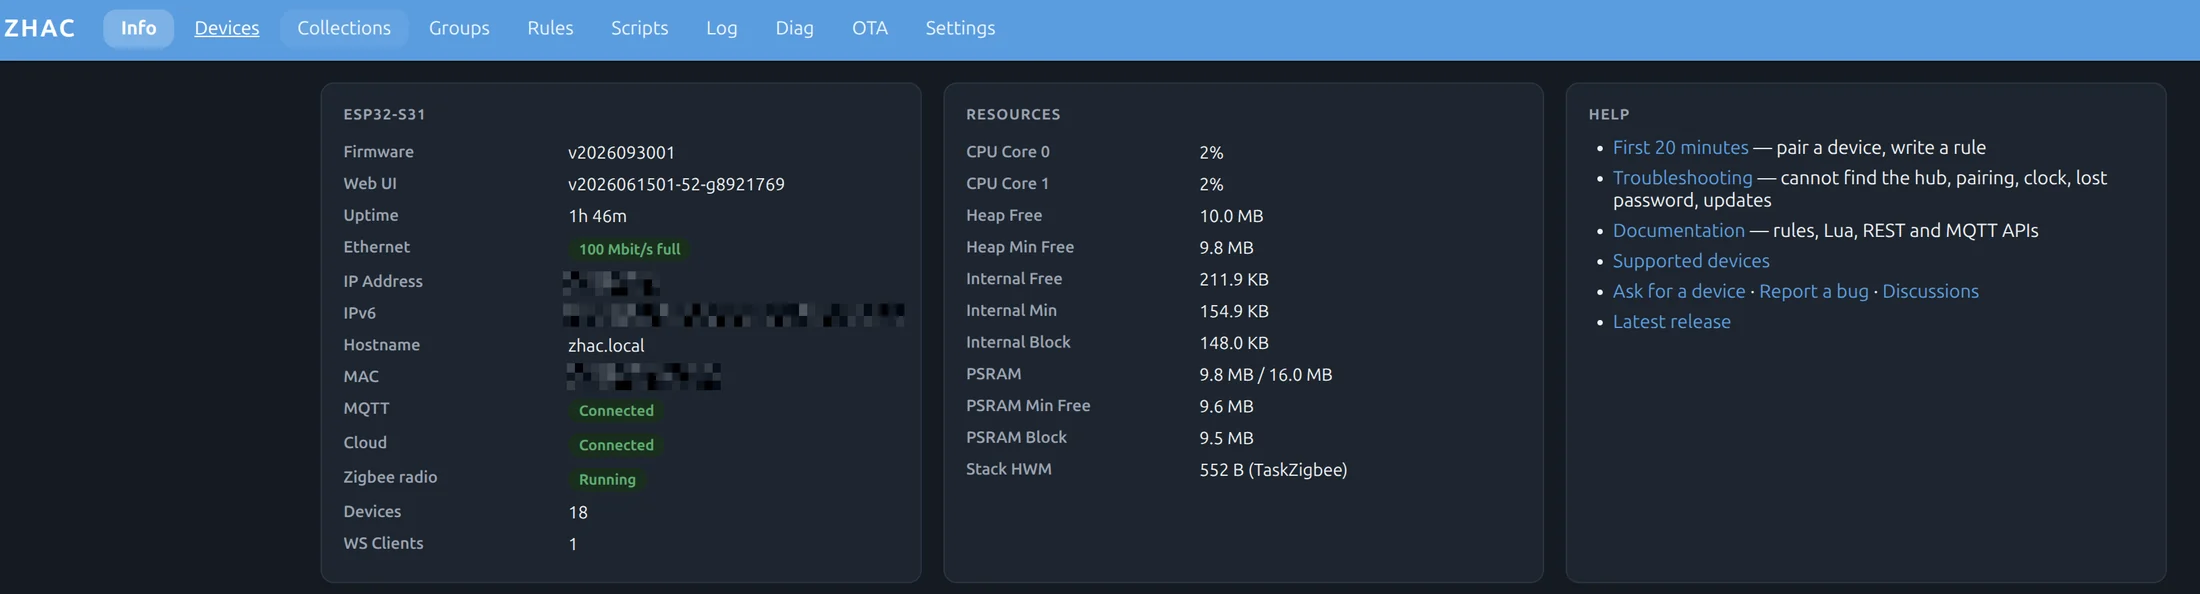
The hub's status page on a real hub: firmware, Ethernet, MQTT and cloud connected, Zigbee radio running, 18 devices, memory use
Know what the hub is doing. Firmware, network, radio and memory at a glance.
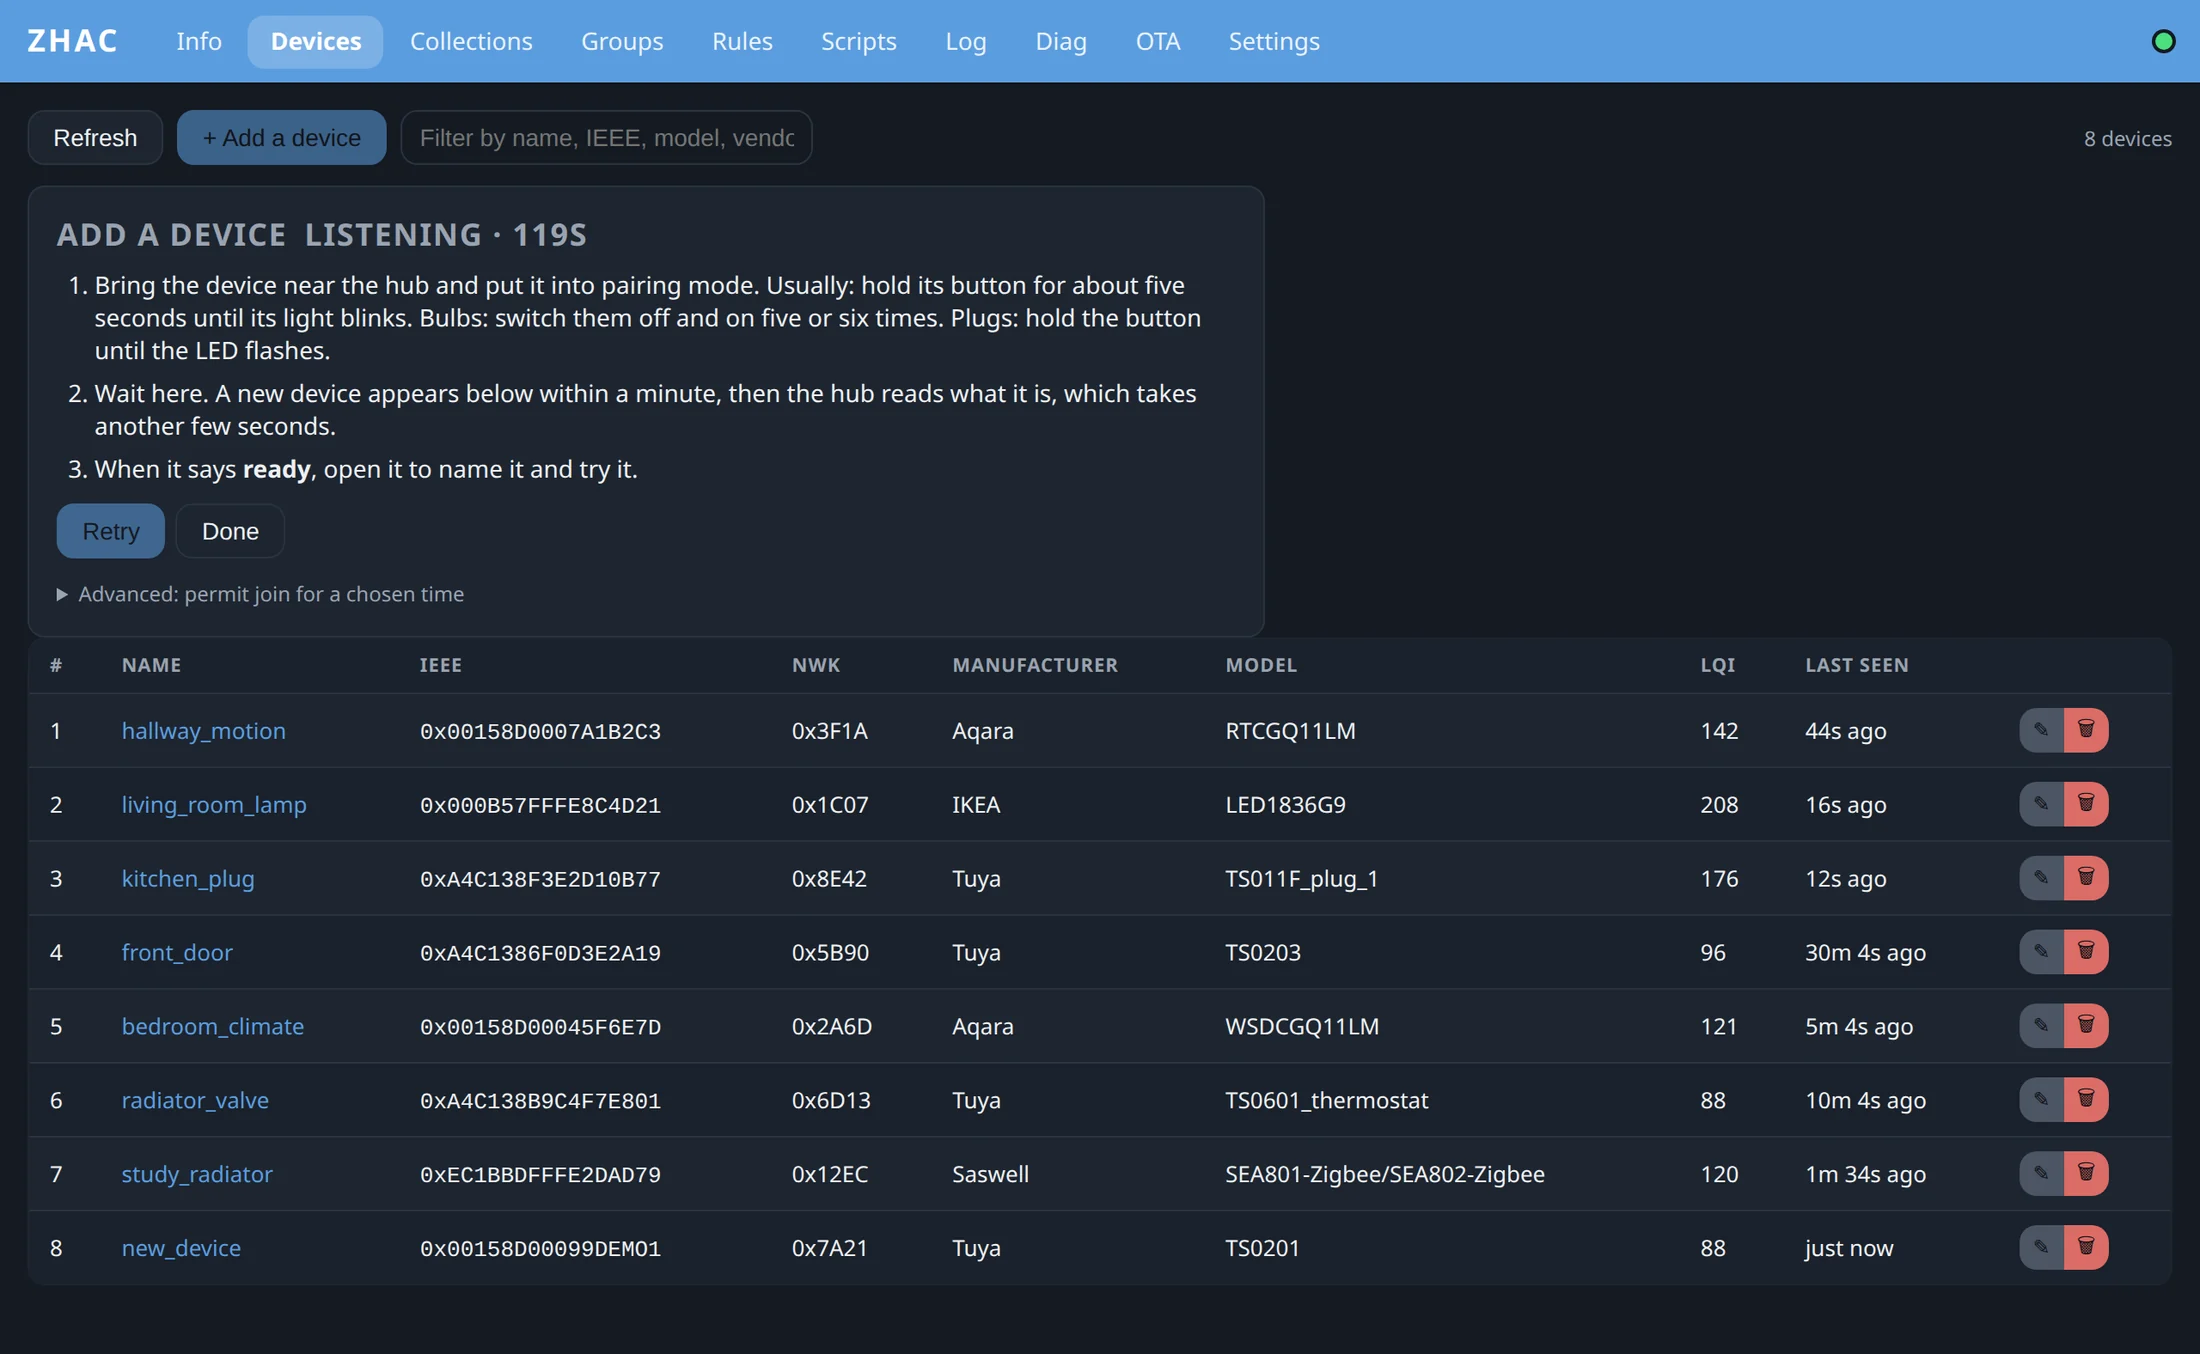
Adding a device: the hub is open for pairing and waits for a new Zigbee device
Pair a device in a few clicks. Open the network, press the device's pairing button, done.

Pick a board

Both boards run the same ZHAC firmware and connect to your router with an Ethernet cable.

The Espressif ESP32-S31 Function-CoreBoard
RECOMMENDED

Espressif ESP32-S31 Function-CoreBoard

About $25

  • Zigbee radio built into the chip
  • Ethernet on the board
  • Flashes from the browser in about two minutes
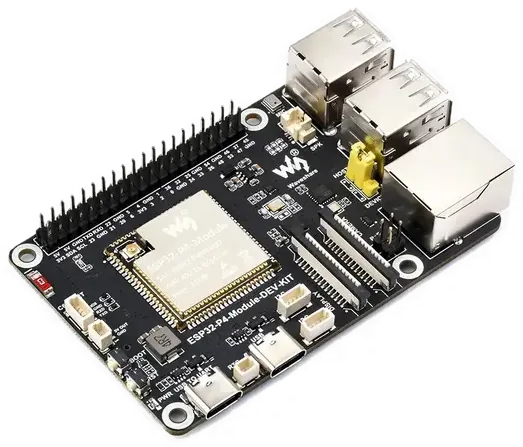
Guition JC-ESP32P4-M3-DEV board

Guition JC-ESP32P4-M3-DEV (ESP32-P4 + C6)

About $25

  • ESP32-P4 runs the hub, a C6 chip is the Zigbee radio
  • Ethernet on the board
  • The C6 radio is installed once, from the same browser page — no adapter

From the box to your first automation

Five steps with the ESP32-S31 board. No toolchain to install.

  1. Get the board and two cables

    A USB-C cable that carries data (charge-only cables will not work) and an Ethernet cable to your router.

  2. Flash it from your browser

    Open zhac.org/flash in Chrome or Edge, pick your board and click Install. It takes about two minutes.

  3. Plug in Ethernet and open the hub

    Go to http://zhac.local. Within ten minutes of switching it on, set the admin password — that keeps strangers on your network out.

  4. Pair your first device

    Click Add a device, then put the sensor, plug or bulb in pairing mode. It appears in the list with its controls.

    The Add a device screen
  5. Make it do something

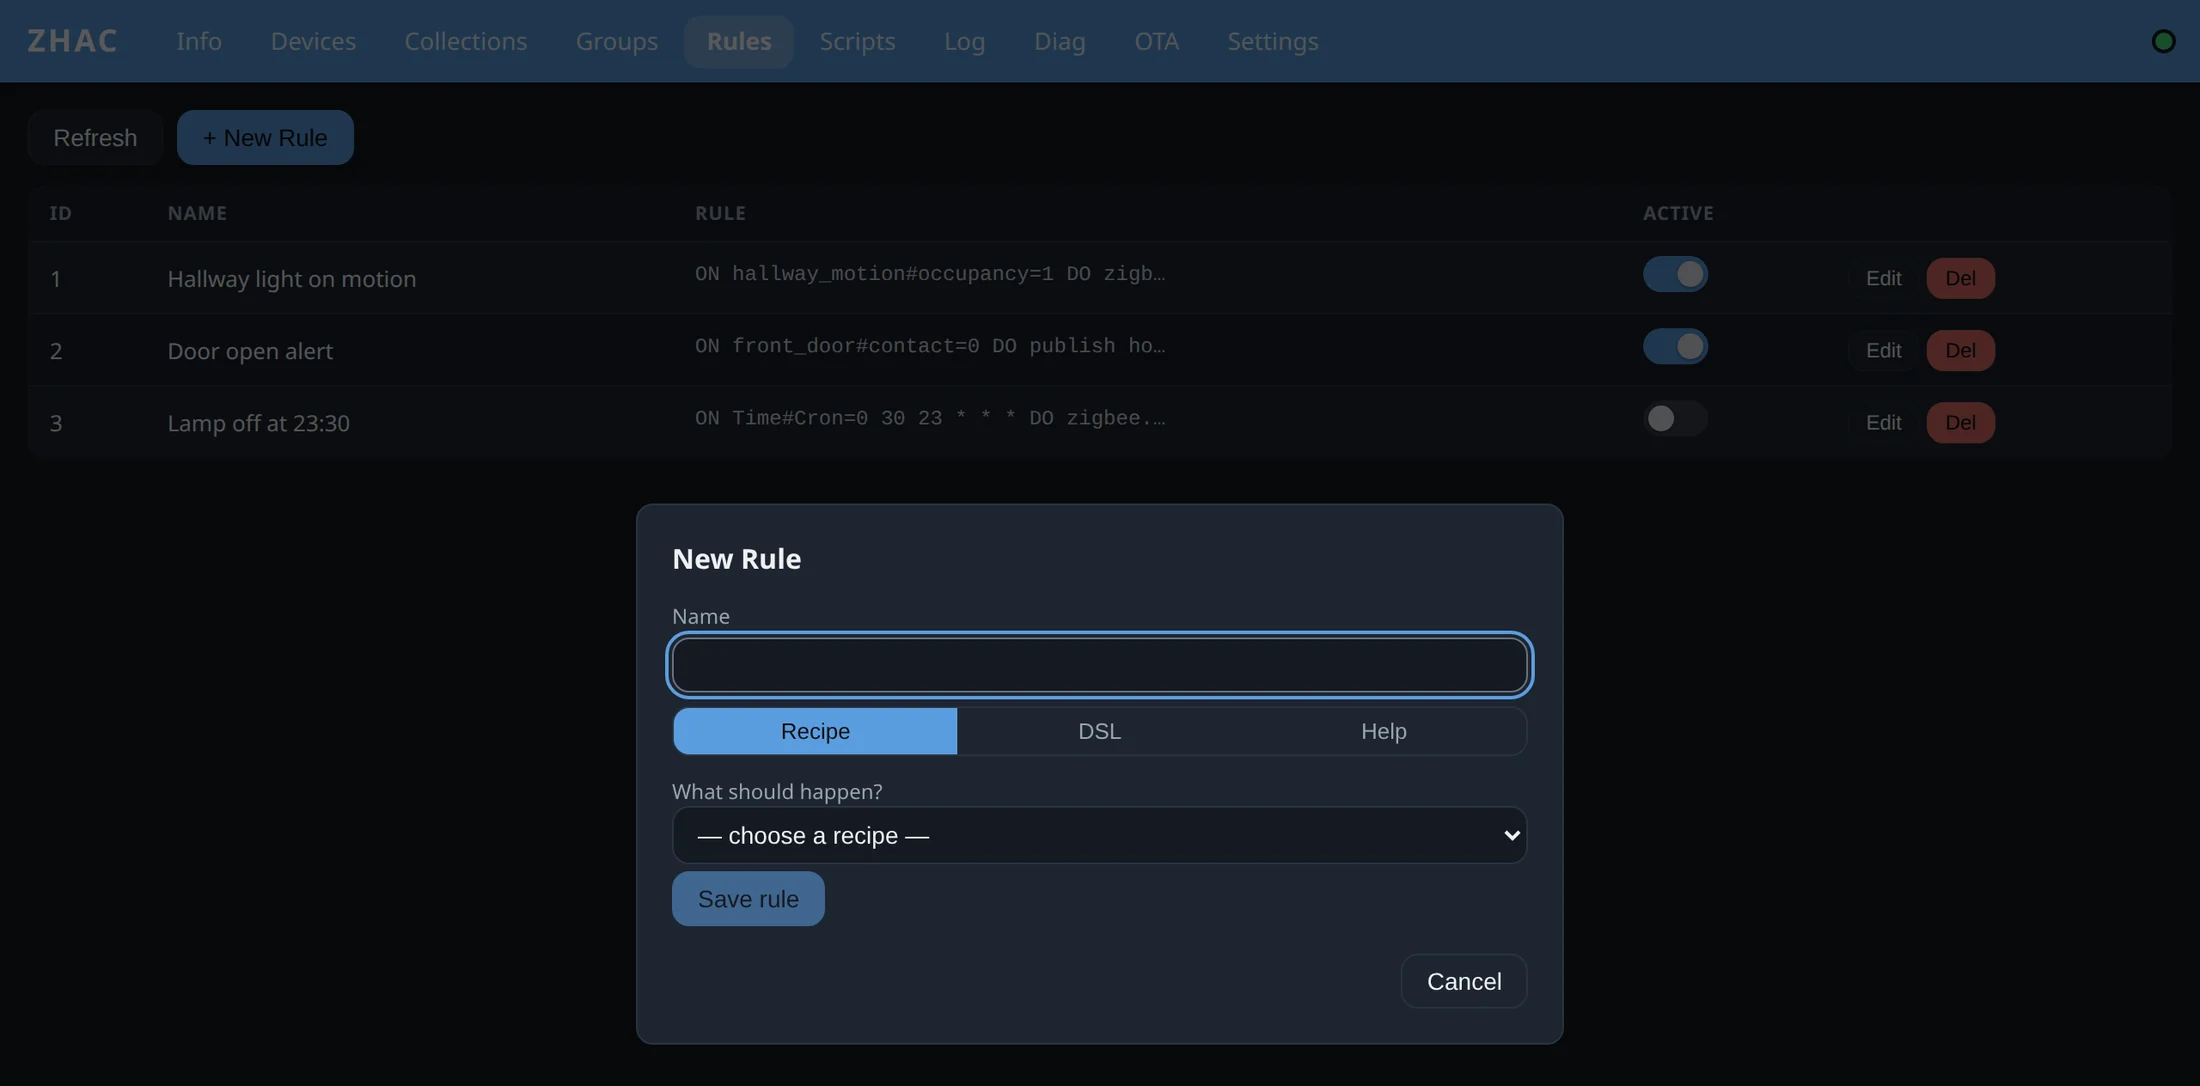
    Create a rule from a recipe, such as light on with motion. From then on it runs on the hub by itself.

    The New Rule dialog with a recipe picker

Flashing, step by step

Everything happens in the browser. Nothing to install except, on Windows, sometimes a USB driver.

Before you start

  • Chrome or Edge on a desktop computer — Safari and Firefox cannot talk to USB devices.
  • A USB-C cable that carries data.
  • On Windows, if the board does not show up: install the CP210x USB driver.
  • Close other programs that use the serial port, like the Arduino IDE.

Flash

  1. Open zhac.org/flash and find your board.
  2. Click Connect and choose the board's port.
  3. Click Install and wait until it says Done.
  4. Unplug the USB cable, connect Ethernet and power.

Updating later

Open the hub's OTA page and install the newest release over the network. Devices, rules and settings stay. If the new version does not start properly, the hub goes back to the previous one by itself.

Re-flashing over USB? Leave Erase the whole flash first unticked to keep your data.

Stuck? Read Troubleshooting or ask in Discussions.

Open source, local first

The hub firmware and the device library are open source (AGPL-3.0) and work 100% on your own network. Nothing about your home leaves it unless you decide so.

An optional cloud, later

A separate ZHAC Cloud — web console, phone app and remote access — is in private testing. The hub never needs it.

Ready to try it?

Flash your board in about two minutes, then pair your first device.

Flash your board Check your devices